Review: Kat Von D, Shade and Light Palette

Tags

, , , , ,

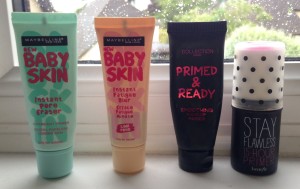
Contouring has never been more prominent in beauty trends. For the past few years, the beauty community has been obsessed with the art of sculpting and redefining your face shape. With so many products available dedicated to contouring and highlighting, I have tried quite a lot of different sculpting makeup options. One product that I have always lusted after, but due to lack of availability in the UK of American beauty brands, I have only just been able to get my paws on Kat Von D’s Shade and Light Palette. Although I’m a little late on the bandwagon, I feel this product isn’t popular at all in the UK. Here are my thoughts, before you invest.

The basic premise of contouring is adding shade to the face to diminish certain features and to highlight and bring forward other areas of the face to extenuate them and to create a flattering and generally, slimmer face shape. The most natural way to do this, is to use matte, bone coloured contour shades and off coloured highlighters- such as yellow, salmon and cream, depending on your skin tone.  In terms of colour selection, this palette caters to a large array of skin tones, which is excellent if like me, you tend to fake tan frequently and you need the breadth of colour. This palette however, comes in one shade and there is no flexibility for skintones, unlike other contouring palettes which are available.

The most important thing for me in a product is the formulation. These are all matte shades, which is great for a natural appearance. Shimmer looks beautiful if you add this after contouring, but generally looks artificial if you use an iridescent shade as a contour.

These formulations are very buttery powders and blend seamlessly. The highlighting colours can be used under the eyes and feel super light weight and don’t settle into any fine lines. That said, the Pro Longwear blush from Mac that I usually use to contour is a lot more of a dense formulation and although it is harder to blend, I feel much more confident that this type of formulation will not slip and slide. However, Kat’s formulations offer a great, everyday palette if you want to contour your face on a daily basis but you want the flexibility of not having to dedicate a lot of time to the process.

photo 2 (13)

The actual packaging is very unique, I very much like it. It’s in keeping with what you would expect from Kat Von D and I understand she sketches out the makeup packaging designs herself. It’s gothic and dark and fits very well with the concept of contouring. Due to the packaging, I would feel confident travelling with this palette, the pans are set in a thick cardboard casing with a magnetic closure on the lid. The packaging is dense and thick, but not heavy and weighty as you may expect from a palette this big.

photo 3 (12)

The highlighting shades are all named strategically with word choices starting with L, emphasising the powder uses of adding light- Lucid, Lyric and Levitation. Equally, the contouring powders that add shadow all start with an S- Sombre, Shadowplay and Subconscious, which I feel is a well thought out touch.

The contouring colours are very large, they weigh 4.5g each, which is a fair amount of product. The highlighting colours are visibly smaller and weigh 2.3g each. In total, you do get a generous amount of product. That said, due to the fitment of the pans, you can not get refillable product like you can with other contouring palettes. Naturally, you will probably gravitate towards a particular contouring and highlighting shade, so it is a drawback that you would have to purchase a whole new palette once you hit pan.

photo 1 (12)

Another drawback and for many, the clincher is how much this product costs. I purchased this from Sephora US and with the exchange rate it was around £32 with £20 for shipping to the UK. I did make a pretty large order to compensate for the shipping price, but if you did want to order this palette from a reputable and trusted site like Sephora, you are looking at around £50 in total.Unlike other expensive palettes, you receive no added extras. There is a matching Kat Von D, double ended contouring and highlighting brush but it is very pricey and sold separately to the palette.

In conclusion, I do like this palette because it’s great for everyday use- it would be perfect for beginners because the formulations are so blendable, it would also be good for travelling due to the sturdy packaging and the varying tones mean your highlighting and contouring colours would be catered for even when you have a tan or are fairer. That said, if you already have a contouring routine that works for you, then don’t invest into this palette. It’s not a professional palette and doesn’t give phenomenal results any better than any other products I have tried and it is very expensive.

If you enjoyed this please like, comment and subscribe to Girl About Town

Boudoir Beauty

Tags

, , , ,

I am so excited to collaborate for this extra special post with lingerie company, Adore Me. When the lovely girls there asked me to prepare a series of makeup looks with perfect products for their beautiful lingerie collection, I couldn’t wait to chose four different lingerie pieces, with varying styles, colours and themes with makeup looks to match… Get some serious boudior beauty with Adore Me!

Style One; Classic Black

There is nothing more chic than clean, black lace. There is also nothing more sophisticated than a simple smokey eye. First of all, remember to prime your skin for maximum makeup longevity. My favorite primers are below: Maybelline’s Baby Skin Instant Pore Eraser Original and in Cool Rose (depending on your complexion), Collection’s Primed and Ready and Benefit’s Stay Flawless Primer. All of these have different applicators, consistencies, colours and textures for every lifestyle, budget and skin type.

uw 1

Next, for a simple smokey eye, I use MAC’s Trax Eye shadow on my mobile lid, which is an iridescent plum tone as well as a black kohl pencil along my lash line to smoke it out. I always use MAC’s kohl in Feline. Pair this with a nude, glossy lip and you’re good to go! I opted for MAC’s Cream Sheen Glass in Boy Bait.

photo 2 (11)photo 1 (10)

Style Two; Girly and Cute

This pretty, spring set is so delicate and sweet, it’s impossible not to love the contrasting green lace detailing and pink accents. For this makeup look, I’m keeping things very basic to let the lingerie speak for itself. No girl wants to worry about her makeup in the bedroom! For the lips, keep things simple and apply a natural gloss. This Lipglass by MAC oozes sex appeal without being OTT.

photo 1 (11)

To give a natural sheen on the lids and brow bone, use a cream eye shadow, like this one from Benefit in the shade RSVP. In a hurry? Blend out with your finger for a pretty glow. If you’re more into powder eye shadows, take this shimmery bronze colour from No.7 and dust it along the mobile lid and through the crease for a hit of glow.

photo 2 (12)photo 3 (11) To add a touch of colour to any complexion, Benefit’s Rockateur will make you look healthy and rosy. Dust along the apples of your cheeks for a natural blush.

photo 4 (7)

Style Three; Cosy and Warm

I absolutely adored the hints of chocolate and strawberry pink in this warm coloured set. It looks absolutely good enough to eat. For this warm, chocolate themed look, I’m using cream eye shadows from L’Oreal’s Colour Tattoo in On and On Bronze for a luxurious, golden colour. For a richer chocolate tone, take Estee Lauder’s Cosmic. Blend this deep burgundy over the lid for some seriously rich toned glamour.

w1

For added warm glamour, dust Benefit’s One Hot Minute powder over the apples of your cheeks and up to your temples. This will warm up your face whilst also giving a slight shimmer to the complexion.

w5

Style Four; Cool and Crisp

A clean and cool toned theme always looks smart and sassy. To ensure your foundation locks in place all night, I suggest using one of these long lasting formulas: Estee Lauder Double Wear Maximum Coverage, MAC Studio Fix or Collection’s Naturalle Matt. Ranging in price, these foundations will cover up a multitude of sins whilst also promising to stay in place throughout any activity.

uw2

Tackle brows and eye lids all in one swoop with Urban Decay’s Naked 2 Palette. As you can see, mine is well loved and with good reason! These cool toned shadows will suit every eye colour but can make darker complexion look ashy, so be sure to prime the lids well. An effortless, matte, cool toned smokey eye was never so easy.

uw3

Add a splash of colour to a monochrome look with a bold, cool lip. My favourite magenta colours are MAC’s Lickable and namesake, Girl About Town! uw4

What’s your favourite makeup look? Is it classic black, girly and cute, cosy and warm or cool and crisp?

If you enjoyed this please like, comment and subscribe to Girl About Town

Anti-Spring!

Tags

, , ,

Life is too short to always go with seasonal makeup. As a lover of a dark lip, I can’t limit myself to this indulgence only a few months of the year. Instead, whenever the inspiration strikes me, I have to rock a rich plum or berry lip. For this look, I’ve used a basic cat eye which is still inkeeping with the dark makeup theme but allows the lips to take centre stage. Lets get started!

1) Primer 


photo 1 (7)

To prepare my skin for makeup and to create a flawless canvas for a smooth application, I’m going to take Bourjois’ Bronzing Primer. This is always my primer of choice when I’m tanned as usually my face is slightly lighter than my body. It also smells delicious- super fruity and fresh, which is unusual in a makeup product. I apply that with a stippling brush to make sure it is fully buffed into the skin.

Next, I then tap Benefit’s Porefessional onto my T-Zone. This will minimize the appearance of pores by filling them in, before you’ve even applied any base makeup.

2) Base

photo 2 (8)

To create a flawless, full coverage look I’m using my staple foundation, Estee Lauder’s Double Wear Maximum Coverage. This is a brilliant choice for anyone who wants a high coverage foundation or someone who has trouble with makeup slipping and sliding throughout the day. Even on oily complexions, this foundation won’t budge once it has been allowed to sit on the skin.

To make this foundation slightly darker to match my neck and chest, I’m mixing it with my L’Oreal Nude Magique Eau De Teint. I love wearing this super light coverage foundation on its own for an effortless look, to even out my skin tone but still give a totally natural appearance.

3) Highlight

photo 3 (8)

When I want a full coverage look, highlighting is a must. It is a very flattering tool to apply to aid in slimming out the face whilst also covering any unwanted under eye circles. I firstly apply MUA’s Pro Base Argan Plush Concealer in Fair. The crayon like applicator adds precision to the under eye area, which is great for hiding one too many late nights or tidying up eye shadow to create a crisp, sharp line. The formulation is full coverage and dense but is still very blendable.

To add a little glow and dewiness to this matte look, I am using mac’s Prep and Prime Highlighting Pen in Light Boost over the top of my concealer. This also looks beautiful on its own for a more understated, casual look. I then blended this all out with my beauty blender.

4) Powder

photo 4 (6)

I am very prone to an oily T-Zone, like many people. I find that a greasy nose and forehead can really draw attention to my pores and spoils my matte appearance. To ensure I avoid being overly oily and to lock my makeup in place, I always choose to bake my makeup using powder. With a dry beauty blender, I tap on a generous amount of Nars’ Translucent Loose Powder to my highlighted areas. It is the silkiest and most finely milled powder I have ever used. It also extenuates my highlighted area due to the light reflecting pigments.

For the rest of my face, I use the Collection Sheer Loose Powder. This adds some slight coverage to my face and is a really affordable option. I then let this powder sit on my face as so, for a minimum of 15 minutes to lock in my makeup and to prolong a matte appearance before blend it in with a fluffy brush.

5) Eyes

photo 5 (6) photo 1 (9) photo 2 (10) photo 3 (10)

n2 n3 n1

To begin, I primed my eyelids with the Maybelline Colour Tattoo Eye Shadow in Taupe. I then added some bronzer in my crease using a super fluffy brush, to soften the harshness of the black eyeliner I am about to apply.

Using a step by step process, starting with my wing I being to draw my liner using MUA’s Liquid Eyeliner, it’s an absolute steal at £1! It’s a long lasting formula and is so easy to use thanks to the precise nib. Next, I extend it to the centre of my eye for a dramatic eyeliner look.

For my brows, I defined them using MAC’s Eyebrow Pencil in Stud. This creates a super natural look as you can fill in your eyebrows using short strokes to recreate the appearance of hair. Rimmel do a similar pencil for a really great price.

6) Contour

photo 5 (7)

Contouring is my favourite part of my makeup routine. For me, it’s the fundamental aspect of sculpting the face shape you want.

To chisel my face, I use a fan brush and MAC’s blush in Taupe (I would link this product, but it always seems to be out of stock!). I then use my bronzer of choice and apply this to my temples, which at the moment in the bronzer duo in MAC’s limited edition RiRi Hearts Mac duo in Hibiscus Kiss.

For my blush, I am using Nars’ Dual Intensity Blush Duos in the shade Frenzy, which is a gorgeous coral orange. It looks intimidating in the pan but it is very buildable, so you won’t have to be scared about using too much product. There is also a stunning golden bronze in this duo, which I’ve applied just above my cheek bones. It is so beautiful on olive skinned women or those with darker skin tones.

7) Lips

photo 1 (8)

photo 3 (9)

The lips are the main focus of this look. As you can see, you can change up the lip colour to accommodate your preferences. For me, this means a dark purple. MAC’s Cyber, Hung Up or Nightmoth is absolutely beautiful for a deep, opaque, gothic lip. However, there are a few golden rules of rocking a dark lip which are important.

1- Exfoliate your lips prior to applying lip colour. Use a dry toothbrush and rub your lips gently in circular motions. This will create a smooth base.

2- Prime your mouth by applying foundation to your lips to mute out your natural colour, then lightly powder them. This will allow you to redefine your lips as you wish and to create a smooth canvas for lip products.

3- When applying your lip colour, always layer it up gradually. This will secure longevity.

4- Add precision to your lips by using a concealer brush to clean up any unevenness you may have made when applying your lip colour. You can use a lighter concealer on your cupids bow to make them look fuller.


I hope you enjoyed my Anti-Spring makeup look and rock a dark lip all year around!


If you enjoyed this please like, comment and subscribe to Girl About Town.

Travel Appropriate Makeup

Tags

, , , , ,

For me, travel makeup is an art. The issue is that you want to look presentable for your travels with as much ease and simplicity as possible, which can sometimes prove problematic. This for me means keeping your products to a minimum and condensing your makeup routine to a quick and easy look that still makes you feel polished and presentable.

Admittedly, when I’m travelling via plane I avoid wearing makeup and instead generously spritz a hydrating facial spray during the journey and lather up my face in moisturiser before and after the flight due to dehydration. However, this weekend I traveled across the country with no planes insight, but I still wanted a quick, no fuss look that was guaranteed to last.

Stage One: Base

For my face makeup, I wanted a layered but sheer look that didn’t feel too heavy. Because of this, I applied Benefit’s Porefessional as my primer. Unlike most silicone based primers, it’s pigmented so offers some coverage whilst still looking totally natural and filling in my pores and providing a long lasting base.

After this, I shook up my Eau De Teint from L’Oreal and buffed this fluid, super light foundation over my face. For me, I really think this product should primarily be used to even out your skin tone rather than as a traditional foundation. If you have any other imperfections you wish to mask, apply a concealer before this foundation application. This will also help with the light layers to keep your makeups longevity.

photo+1

This foundation offers such a light coverage and is absolutely weightless on the skin. It reduces redness and any skin pigmentation issues, looks natural and is totally travel friendly. Your skin can breath whilst still enhancing your natural radiance.

photo+3

Step Two: Powder

Next, I dusted a light amount of Nars’ Light Reflecting Loose Setting Powder across my T Zone before contouring my face using a fan brush and MAC’s Pro Long Wear Blush in Taupe. For me, highlighting isn’t an absolute necessity but carving out definition in my face is.

Step Three: Eyes

Many people would argue that your eye makeup can have the most impact on your entire makeup look, so it’s quite plausible for your eyes to have the concentration of product. I’ve decided to keep my eye makeup simple, but still have plenty of definition.

Because of that, my mascara of choice for maximum impact is the L’Oreal Black Double Extension Mascara in waterproof. The primer lengthens your lashes drastically and the blue end adds carbon black colour whilst separating and defining your lashes. Don’t be scared of waterproof mascara, it is an oil prone girls best friend and always, always has an excellent formulation for volume and length. Waterproof mascara will hold up better when you’re travelling and is easily removed with an oil cleanser or oil based eye makeup remover.

A word of caution though, avoid stroking the primer wand down against the top of lashes as it is near impossible to rid the top of lashes of the white pigmentation!

photo+1 (1)

I live life on the edge and choose to risk breaking my lashes once I’ve applied mascara and use eyelash curlers after application so they hold the curl. However if this is a concern for you, curl your lashes before mascara. Then I applied MUA’s Liquid Eyeliner in Shade 5. This brush is easy to control, very precise and is so affordable at only £1…Bargain! That said, you will need to carry it with you to touch up as it does crack and smudge especially in humidity. I choose to only apply eyeliner to the outer third of my eyelid, to elongate the eye and stop the harsh black shade closing in the area and making it appear smaller.

Groomed brows are essential if you’re channeling a minimal makeup look. I brushed mine through and filled in any sparse areas with Urban Decay’s Naked Basics 2 Palette, which is great for creating an ombre brow. Using a clear mascara will keep your eyebrows looking natural, highlighting the natural hairs in your brow, aiding definition and making them appear more full.

photo+2 (2) photo+3 (1)

Step Four: Lips

To keep things simple and since I am travelling, I opted for a tinted lip balm from The Body Shop. Their Born Lippy Blam in Pink Berry is so moisturising, smells delicious and is great if you’re on the move. Place it in your bag and apply liberally whenever your lips feel slightly dry.

photo+4 (1) photo+5 (1)

This is my finished, fuss free travel makeup look! What’s your travel makeup necessity?

If you enjoyed this please like, comment and subscribe to Girl About Town

Feb Faves!

Tags

, , ,

It’s February favourites time! I love monthly favourites posts because I feel that it gives me the opportunity to see what new products are worth the hype or what classic oldies are good to invest into, based on other peoples testimonials, which are the best reviews.

This weekend I’ve purchased some new MAC goodies from their limited edition Toledo collection and I’m waiting for them to be delivered but I just know I’m going to love the products, so watch out for a mini review of that ahead of the Cinderella collection launch…Exciting makeup times ahead!

1.Lush’s Eau Roma Toning Water- £7.95

This month has seen my first skincare experience with Lush. I’m very much used to their bathing ranges, but I’ve never purchased any products from them to be used on the face. I absolutely adored the consultation experience you receive from Lush when you are inquiring about skincare products. The store assistants couldn’t be more approachable or knowledgeable and they all relate the products back to their own personal skincare journey which is really beneficial for contextual information.

In terms of the actual toning water, it is so refreshing on the skin and instantly calming. After using harsh toners in the past for my oil prone skin, it’s feels so soothing to not have to instantly slather on moisturiser because my toner has dried out my skin. Instead, it feels revived. This product is great for an instant pick me up, not just when you’re cleansing your face but it is definitely a travel must have to keep your skin hydrated when travelling.

photo 5 (5)

2. Lush’s Fresh Farmacy Facial Soap- £4.99 (100g)

I never used to be preoccupied with the ingredients that go into my skincare products. It’s only been recently, when my skin had become more temperamental, that I’ve taken the time to become aware of what goes into my skincare items. Because of that, I think Lush is a great store option if you want to make an effort to use more natural cleansing products than traditional high street items, that are still very much accessible, readily available and affordable.

As a high coverage makeup girl, I do use a micellar water to remove my stubborn eye and lip products and to lift off the primary makeup on my face. Then I will go in with this solid soap which is convenient, smells beautiful and leaves my skin feeling fresh and cleansed, without the tightness and drying out effect. I lather it up in my hands and it foams like hand soap then massage it into a damp face. I repeat this process two or three times for squeaky clean skin..Easy!

photo 4 (5)

3. Sally’s ASP One Cut Tip Clipper- £8.49

This is a slightly weird favourite, but hear me out! I am so lazy when it comes to my nails, I don’t have the time or patience to re-manicure my talons several times a week. Because of that, I always opt for acrylics as a convenient option that keeps your nails looking fabulous for weeks on end with minimal touch ups.

Because I am so lazy though, I often skip the nail bar for around four weeks before I get infills and by that time my nails can be slightly longer than I like because of the out growth. These clippers are strong enough to cut down the acrylic nail and feel very durable. They are totally worth purchasing if you are the lazy nail girl, like me. Nails are left looking neat and professional, without a nail bar insight so you can postpone it for another week.

photo 3 (7)

4. Primark’s Hair Turban- £2.50

This is such a basic favourite but one which I have been totally obsessed with. There is nothing more distracting when I’m washing my face or applying my makeup, than hair getting stuck on a wet and sticky face…Yuck! Unlike traditional clips or bands, this pushes my hair back and keeps it there. The material is a soft flannel that is several inches thick, giving you extra security that pesky hair will be kept away. It doesn’t pinch and is leopard print, so looks super cute.


photo 2 (7)

5. Estee Lauder’s Day Wear Moisturiser- £38.00

After using gel based, quick drying and mattifying day moisturisers for years, I’ve recently taken a U Turn and I’ve started using super rich products instead. My current foundation (Estee Lauders Double Wear Maximum Coverage Foundation) is super dry and mattifying, so having a hydrating moisturiser makes blending it in a lot quicker and easier. It smells fresh like cucumber and feels really hydrating and soothing.

photo 1 (6)

What has been some of your favourite picks this month?

If you enjoyed this please like, comment and subscribe to Girl About Town


Get Naked

Tags

, , , , ,

It’s no secret that I love Naked. First, second or third time round, it’s all very satisfying and enthralling… Urban Decay’s Naked that is!

I feel that the beauty industry was thrown upside down by the Naked makeup franchise. It was such a basic concept, a palette of continuous neutral tones ranging from light to dark, matte to shimmer but the introduction of Urban Decay’s Naked palettes made huge ripples in the beauty industry and for good reason. After the release of the original Naked palette years ago many other brands tried to imitate the palette but Urbanettes demanded more and so brought the introduction of the cool toned Naked 2 and the beautiful rose gold Naked 3.

However, that was not enough for makeup junkies and so came Naked Basics, bite sized amounts of matte Naked colours, small enough to be carried around and used on the go. I personally opted for the cool toned, Naked Basics 2 and I am going to let you into my true thoughts on this palette.

photo 1 (5)

The first thing that must be noted is that unlike it’s distant cousin, the original Naked palette, it doesn’t have a suade finish. Gone are the unpractical materials which cased our palettes that absorbed and attracted dirt and mess, like the furry finish of the original Naked palette. Instead, this has a hard outer casing that feels solid and weighty, giving it an expensive feel. The compact size of the palette combined with the external feel makes it the ideal travel companion. It is rigid and the clasp fits tightly, making it look and feel secure.

photo 2 (6)

Onced opened up, you are greeted with a wide, full sized mirror. Although not totally magnified, it does make eye shadow application very easy and precise.

The actual colour selection is beautiful. Unlike the original Naked Basics, it is a cool toned palette, with a very continuous and flowing feel to the colour choices. My immediate thought when I first saw the original Naked Basics was that the colours appeared disjointed and harsh, making me feel that throwing a quick but stunning eye shadow look together would be more of a challenge. With this pallete, you really can’t go wrong. Every colour marries together so beautifully and homogeneously.

Urban Decay actually offer my favourite eye shadow formulations. For me, their colour payoff and pigmentation is better than any other brand (MAC included) and is so intense. That said, you only need to use a very minimal amount of shadow, especially if you want a delicate make up look. I personally adore this eye shadow for smoking out my bottom lash line without adding too much darkness to my overall eye look.

photo 3 (6)

I feel this pallete would be great, particularly for beginners. Every eye shadow colour fits together perfectly, you couldn’t choose a more fool proof eye colour selection. That said, if you are an experienced makeup junkie, this makes the perfect kit for the most intricate smokey eye. The amount of transitional colours in this palette make any vatriant of smokey eye so simple and so blendable.

It’s also such a versatile palette. I wear this eye shadow to work, which is a formal office environment but It’s also my palette of choice when I’m going on a night out. It’s so easy to grab a shimmery shadow to pop on my lids for variety, because of course these shadows are all matte. This palette is so multi-use, I even apply it to my brows. The gradual and slight tone differences between each shade makes it so easy to create a flawless gradient brow on most skin tones and hair colours.

But, lets get down to business. This palette retails at £23 which some may find pricey, but I think is extremely good value for money. Taking into account it’s practicality, the shadow choice, the formulations, how versatile and usable this product is, I think you get a lot for your buck. You really could apply this product everyday and create a limitless amount of looks, especially if like me, you use it in conjunction with other shadow palettes. That said, you can create the most dramatic spotlight eye look with this palette by combining these mate shades which I often opt for on an everyday basis.

The only flaw this palette has is that I feel the eye shadows are very dry and chalky, so much so that if you have long nails, you will pick out chunks of the shadow in the pan! When using a heavy hand to apply this shadow, there will be a lot of fall out on the palette, which runs the risk of mixing pan colours.

In summary, of course I think everyone should purchase this palette! Whether you are a makeup pro or just starting off on your beautifying journey, you will absolutely not regret buying into this palette. It will be your favorite travel companion and your best friend to carry you from weekday to weekend.

If you enjoyed this please like, comment and subscribe to Girl About Town


January Favourites!

Tags

, , , ,

January is officially over, which means we are well on our way into 2015! This month, Estee Lauder as a brand really stood out for me, more so than any other makeup companies this month. I’m really happy to have purchased more products from them for my makeup collection.

Let’s get started!

1. Estee Lauder- Double Wear Maximum Cover (£29.50)

I absolutely adore this foundation and it has totally changed my makeup routine. Although it is designed for people with skin issues such as birthmarks or scarring which I don’t have, the high coverage  formulation from this foundation is better than any other product I’ve tried.

This is the perfect foundation for anyone with an oily skin type who doesn’t necessarily have the time to touch up throughout the day. This foundation guarantees such longevity with no oxidising or transferring.

It’s a very thick formulation, you only need a pea sized amount for your whole face. The key for applying this product is to work in sections and to move quickly as when this product sets, there is no budging it. Because of that, it’s also definitely sensible to invest in a good quality cleanser to remove this product. The foundation is totally mattifying on the skin and as an oily skin type I don’t even need to powder at all because this foundation seems to absorb and stop excess oil production.

It is an expensive product but totally worth every penny, so I would recommend asking for a sample first, to see how this foundation wears on your skin. Don’t forget, you can also sheer this product out by either mixing this with your moisturiser or an illuminating product, like MAC’s Strobe Cream to give a lighter appearance. You can also use this as a concealer and target certain areas of the face, rather than apply it to all of your face.

photo (13)

2. Estee Lauder- Pure Colour Shadow Paint in Cosmic (£20)

For those of you who don’t know, MAC and Estee Lauder are sister companies. Through working in the research and development of cosmetics, I know that when companies have these relationships, there is always an element of cross over with their product formulations. That said, I was suspicious that this product was going to be similar to the MAC Paint Pots. I wasn’t wrong and this product is comparable with both the packaging and the formulation, if not slightly sheerer than the Paint Pots.

I’ve recently been in love with cream eye shadows. They are so practical for busy people who want their product to stay and not fade through out the day, but may not have enough time to blend powder products. It takes seconds to apply cream eye shadows with a flat top brush to the lid and blend them out. This formulation is super pigmented, blends well and is just the most beautiful red toned brown with a slight shimmer. It can be worn with any lip colour because it’s relatively neutral and the colour is so appropriate for this time of year.

photo 4 (4)


3. Estee Lauder- Lisa Perry Eye Shadow Palette

The last Estee Lauder product, I promise! For a high end company, I think it’s great that Estee Lauder do so many incredible promotions throughout the year. Currently, if you purchase two or more products, you receive a makeup bag filled up with travel sized goodies. One of the gifts is this eye shadow palette which is so different to any other I have in my collection, but very beautiful.

This has the perfect combination of a highlight colour, a mid tone matte crease colour and two colour choices for the lid. The plum is very day to night time appropriate and the blue adds variety to a fantastic colour choice, complete with basic transition colours.

photo 3 (5)


4. MAC Lipstick- Vegas Volt (£15.50)

I absolutely adore this beautiful feusia under toned, orange lipstick so it’s no wonder I’ve repurchased this. The colour is so spring appropriate and now we are moving away from winter and closer to nicer weather, this colour is perfect. This is an amplified formulation, so it’s really going to pop and stand out from the crowd.  I’ve paired this lipstick with the previous cream eye colour, to give a really warm toned makeup look that was super beautiful.

photo 5 (4)

5. Mason Pearson Hair Brush

I was luck enough to be gifted this gorgeous brush many years ago. Since purchasing the Tangle Teezer, which I feel uses the same technology as the Mason Pearson brushes, I’ve neglected this product. I’ve recently fallen back in love with it as it detangles hair so effortlessly, without pulling or tugging.

I hate brushes that break and snap the hair as it is detangling but this is not an issue with this brush. It also looks so beautiful (when the hair is removed from the bristles, oops!) and classy on any dressing table. The combination of the vintage red and black colour scheme is timeless. Find your nearest stockist of this brush and invest in a hair care product that will last a lifetime.

photo 2 (5)

6. Johnson’s Baby Lotion- £3.35

This is such an oldie but a goodie product! Since Christmas, my eczema has really flared up, partly because of the changing weather conditions and partly also because of my over exposure to chemicals in my body care routine. Because of that, when I need to moisturise my body and I want a lotion that smells and feels beautiful, I always reach for this product.

Another great use of this product is to apply it to remove makeup. Simply take a small amount onto a cotton round and wipe away any makeup. Follow that with either your toner or a cotton round with water absorbed, to stop too much oil being absorbed by your skin.

photo 1 (4)

These have been a little selection of my favourite products this month. What were your holy grail items?


If you enjoyed this please like, comment and subscribe to Girl About Town

Beautiful Blushes

Tags

, , , ,

I always find this time of year quite awkward when it comes to seasonal makeup tone selections and giving your blush colours consideration is always essential. Although we are pushing away from the warm hues and matallics of winter, we are also edging closer to the pastel, cool tones of spring. Because of this, it’s important to choose blush colours that are reminiscent of winter but are also relatively spring inspired.

1. Gosh Natural Touch Blush- 005 Lusty Pink

This is one of my favourite cream blushes. The colour is very summery, but because of the deep berry undertones, you can’t quite smell the any hints of sun cream. The formulation is surprisingly long wearing, even on oily skin types and blends easily when applied with a warm finger to help break down the product. This blush is a particular winner for me when I want to do a natural makeup look- don’t let the pigmentation fool you, it looks super natural and gives you a delicate and pretty flushed appearance.

photo 5 (3) photo 4 (3)

2. MAC- Breath of Plum

Of course, there had to be at least one MAC product in here, but I did only limit it to one blush colour. This mauve, dusky rose looks beautiful on all skin tones, all year round. The purple shade running throughout make it deep enough to sport in the winter, but the pink hues also make it a natural option for the spring. This powder formulation is ideal for oily skin tones and blends in beautifully with a well powdered base.

photo 3 (4) photo 2 (4)

3. Sleek- Sugar 364 Palette

Sleek paved the way for powder face products on the high street when they released their contour kit years ago. Now, the brand have branched out into a multitude of blush colours and finishes. I absolutely adore blush palettes, I think they are generally such good value for money because of the amount of product you receive and are a great option if you’re new to makeup and want to experiment with colour. This blush palette is the epitome of spring colours. The mixture of pastel shades and deep red wine tones make it the ideal colour selection for this time of year.

I particularly love that the middle bronze shade is super shimmery, but the coral and berry colours on the far side of the palette are relatively matte, contributing variety in colours and finishes. I also generally tend to opt for powder formulations anyway, because of my oily skin type however, these blushes are quite powdery and do transfer very easily.

photo 3 (3) photo 4 (2)

4. Benefit-Rockature

This blush is the most beautiful, warm spring colour for paler complexions. The romantic, rose gold tones throughout this blush warms the face whilst also adding a delicate, feminine glow. That said, when I first purchased this blush, I didn’t actually like the colour! It looked muddy and cheap and I was very disappointed considering this is the most expensive of Benefit’s boxed blushes. However, I persevered and realised that the dirty finish this product was giving, was because of the gold colour spray on the surface of the product. After two or so uses, this finish disappears and you have the actual pigmentation of the product, so don’t be put off too easily!

It’s a beautiful shimmery, frosted finish and this apricot tone compliments the darkest to the lightest contouring or bronzing shade, without looking too over bearing.
photo 2 (3) photo 1 (3)

5. MUA- English Rose Mosaic Blush

This frosted pink blush has highlights of corals and pastel lavender, making it so autumn/spring appropriate. On paler complexions, this adds a hint of a summery glow but acts as more of a highlighted sheen on darker skin tones. Being from the makeup brand MUA, it’s super affordable too! I adore the diversity of the pastel purples with the rich, warm coral tones.

photo 5 (2)photo (12)


What are your favourite blush colours for this time of year?

If you enjoyed this please like, comment and subscribe to Girl About Town


Date Night Makeup Look

Tags

, , , , ,

For this date night appropriate makeup look, I wanted it to be relatively simple but also very warm toned.

I feel like when you’re going out, you don’t always want to be worrying about touching up your makeup and you want to trust it to stay looking pretty and delicate, wherever the night will take you.

Step One

To create my warm toned, bronzed and brown eye, I’m using a MAC pigment in Copper and also a limited edition Estee Lauder palette. The main shadow I’m using is this gorgeous, chocolate toned brown. You can always use a grey toned taupe, like MAC’s Omega if you need a transition colour on your brow bone, but I wanted to keep this relatively simplistic and only use two colours on my eye.

photo 1

Firstly, with a flat top eye shadow brush, I packed on the pigment to my lid. Of course, these are quite messy products to work with, so I would always do my eyes first when using pigments, so you can clear up any fall out from these loose products. I layered up this copper, but you can ramp up the intensity for an even bolder copper effect by slightly dampening your brush with water or a setting spray.

photo 2

Step Two

With a fluffy blending brush (my absolute favourite is the 224 from MAC), I gradually started applying the mid tone brown shadow in the outer corner of my eye. This is quite a time consuming process as applying too much product too quickly can ruin the subtlety of the pigment and over power it. My best piece of advice for this stage is that when you think you’ve blended in your shadow, blend some more! Start slowly and build up to your desired intensity.

When you’re happy with the shadow, I then went back in with the pigment as it can lose some of its intensity from working in the eye shadow above it. You could create a really simple spotlight look, by applying the matte brown shadow into the corner of the eye also, to spice up this look.

photo 3

Step Three

I sped through my face makeup and applied my MAC Studio Fix Fluid foundation with a beauty blender and then for my highlight, I’ve applied the MUA Argan Plush Concealer. The pen like applicator is really great for adding precision to where you want to apply your highlight. It’s great as a touch up pen for your eye shadow and lip liner also.

photo 4

Step Four

I’ve recently become a real fan of “baking” my makeup. Leaving my foundation and concealer to sit on my skin, before I powder really makes a difference to the over all finish. My makeup appears less caked up and has a much more natural finish when I don’t apply my powder straight away.

Instead, I fill in my brows before I powder. I’m loving a much more full and bushy brow at the moment. To achieve this look, I comb through them with an eyebrow brush then fill in the outer two thirds using the Rimmel London Professional Eyebrow Pencil. This product is great if you’re new to makeup and want a pencil that is easy to apply and no fuss. It also has a brush attached on the lid for ease of application. I then fill in the front of my brow using MAC’s Omega and a fine, angled brush. This adds a much softer and feathered out appearance but you still achieve a full brow.

After that, I tidy them up using my concealer, MAC’s Studio Finish, which is a super dense product, perfect for applying with a squared concealer brush, to achieve a neatened brow. Then set your hard work using your favourite brow gel.

I then powdered my highlight using the Nars Light Reflecting Lose Powder, which is amazing for adding an extra boost to the under eye area. For the rest of my face, I applied the Collection Sheer Loose Powder. This product is great for absorbing excess oil and maintaining a super matte appearance.

After that, I’ve carved out my cheekbones using the Flat Contour brush by Morphe and Mac’s Taupe blush (sorry, I can’t locate it on the MAC website!).

photo 5

Step Five

I then blended my contour out using a fluffy angled brush. With a fine fan brush, I also applied my highlight of choice to the top of my brow bone, up until the tail of my brow. Today I opted for MAC’s Soft and Gentle. This gives a very subtle look, but makes your skin look super healthy and glowing.

photo 2 (2)

Step Six

Going back onto my eyes, I’ve lined them with the MUA Extreme Felt Liner and added a slightly winged out appearance. Then, of course I added my false lash of choice and at the moment that is MAC’s No.1 Lash. These are super dense and thick, but because they aren’t too long, they have quite a natural appearance. I then curled my lashes and applied mascara over the top to blend the false lashes in with my natural ones as well as to add volume to my lower lashes. The mascara I opted for today was Urban Decay’s Perversion.

photo 3 (2)

On my lips, I’m wearing a combination from MUA which consists of their Matte Lipstick in Totally Nude and their Lip Liner in Caramel Nougat… Yummy! Don’t forget to dust some of your highlight on your cupids bow and in the centre of your bottom lip for added dimension on a matte lip.

photo 4 (1)

Step Seven

Here is my finished look! Simple, natural but also very polished and presentable. For an entra helping of sultry, dust some of your bronzer on your bottom lash line to smoke out the eye without adding too much darkness. Set your makeup to stop it straying by using Urban Decay’s All Nighter Setting Spray.

photo 5 (1) photo 1 (1)

What’s your go to Date Night lip colour?

If you enjoyed this please Like, Comment and Subscribe to Girl About Town.


December Favourites!

Tags

, , , , ,

For my first post of 2015, I’m regressing back to last year with my favourite beauty buys of December. I’ve used so many amazing beauty products last month, it was a real challenge to condense them into a bite sized chunk. That said, I’ve had a real variety of makeup products in my favourites last month, from a number of brands…Enjoy!

Tom Ford Lipstick- 13 Blush Nude

This lipstick is absolutely beautiful. The packaging for a start feels weighty and expensive. The colour combination of the components consists of gold and sleek black, that would look beautiful on any vanity.

The formulation itself is sublime, super glossy and moisturising on the lips. However, you would expect so for nearly £40 for a single lipstick. This product is definitely a splurge but for a special occasion like a wedding, I think it’s worth it. If you are splashing out on one lipstick, I would always opt for a neutral tone. This shade is in Blush Nude, which makes it so wearable for any event and with any clothing colour choice.

photo_1 (24)

photo_2 (22)

Beautiful but pricey

MAC Lashes- No.6

A lot of people choose to opt for cheaper lashes, but I totally believe you get what you pay for with these fluttery delights. As someone with sensitive eyes, I know the constant irritation I sometimes get with lashes which aren’t particularly well made or use good quality hair. This irritation stopped when I switched to better quality lashes, such as these from MAC. Not only are they absolutely stunning, looking super dramatic in appearance with their decadent length and sheer darkness, but they can be reused time and time again.

Another benefit to using lashes from MAC is that they are a total investment if you are new to wearing false lashes. The band the hairs are positioned on is super thin and flexible, making them straightforward to hide, so they appear more natural and discreet. They are also very easy to mold to your eye shape, which is sometimes very difficult with cheaper lashes that tend to be more firm and brittle. You can then store your falsies in these cute cases MAC lashes come with, which is great for travel. Pick yours up here.

photo_3 (20)

Very party appropriate

MUA- Pro Base Prime & Conceal Palette

Colour correcting can seem quite scary when you first consider applying a green concealer to your face. However, in reality it is much more effective and a simplistic method of pin pointing any skin issues. Unlike traditional methods of concealing facial issues, each colour can be used to combat different areas of problematic skin.

In brief, the green shade is generally used to combat redness, the yellow to neutralise purple tones, the purple used to calm yellow undertones, the brown will neutralise blue skin issues, while the centre shade can be used for brightening. I will definitely do a more in depth post about colour correcting following on from this. However, if you are keen to try this right now, MUA is an affordable brand that consistently produces innovative products for their price bracket.

photo_4 (17)

Affordable and innovative

Benefit- Stay Flawless 15HR Primer

I’ve tried countless primers during my career as a makeup addict and this surpasses any other makeup maximiser. The factor that really stands out to me is that when I do apply this to my face and immediately put on my foundation after, there is a sticky sensation as if my face makeup is adhering to my skin. This is a quality that many may not like, but as an oily skin type, my makeup is prone to sliding off my face throughout the day so this is quite a miracle product! Although I can’t vouch for it lasting a whole 15 hours, it definitely prolongs the longevity of my makeup and surpasses any other primer for creating a smooth canvas to apply my base.

Further to this, another great factor about the Stay Flawless Primer is that you don’t need an applicator. Just pop off the lid, roll the product up and apply directly to the face, no fuss or mess! This is particularly useful if you are on holiday or at a festival and want to minimise the beauty tools you are bringing or can’t always wash your hands before applying makeup. I think this product looks super sweet, although it is a little reminiscent of Topshop’s cosmetic range.

photo_5 (15)

Tried and tested!

MAC Holiday Collection Palette- Keepsake Beige Eyes

I bought this palette because I thought it was so versatile. The colour combinations selected are fantastic if you want to create an office appropriate look, that can also be vamped up with darker shades for a smooth transition out of work. The are several matte brown shades which also work fantastically to fill in any brow colour and are particularly appropriate for creating a transitional, ombre brow due to the varying tones of brown. Apart from the several crease appropriate matte shades (including cult classic eye shadow colour, Omega) there are also several frosted shades ranging from a light gold to a darker, antique bronze. Because of this, it makes it so easy to put together a quick and striking look. There is also a matte white, which works well as a basic highlight.

The packaging can’t be over looked either, it’s bold and stands out from any other of my palettes. Although this currently isn’t still available from MAC as it’s a limited edition, most of these pieces will appear on Ebay or Amazon.

photo_1 (23)

photo_2 (21)

Classic colour combinations

MUA Blushers- Shade 5, Shade 6, Marshmallow and Lolly

As a beauty addict, I find it difficult to say no to new and exciting colour options. I’m particularly enjoying experimenting with different blush shades at the moment and there is no better time to do this than in winter, when so many blush colours can be paired with dramatic berry lips and heavy, bronzed eyes.

I’m particularly enjoying branching out from my usual rosy, pink toned blushes into more bronzed and coral shades, although these can be slightly more difficult to pull off if you are heavily into bronzing and contouring like myself, because these tones are very similar. It can sometimes look like you have extended your contour up to the apples of your cheeks if you don’t choose the right shade. Because of that, I’ve been playing with several bronzed shades from MUA. These affordable blushes and pigmented and very blendable. Although slightly chalky, given that I bought these blushes for pennies in the MUA online sale, you can’t really go wrong.

The blushes I chose were in the colours: Shade 6, Marshmallow, Lolly and Shade 5. My favourite of which is definitely Shade 6 as it adds a slight tan glow to my face but is light enough to differentiate from my contouring and bronzer colour.

photo (10)

(L-R) Shade 6, Marshmallow, Lolly, Shade 5

photo_3 (19)

These were my favourite picks from last year. What were your must have beauty products from December?

If you enjoyed this please like, comment and subscribe to Girl About Town